How to Write in Arabic: A Surprisingly Simple 7-Step Guide
You’ve learned the alphabet. You can even read a few words. But when you pick up a pen, you freeze. The thought of learning how to write in Arabic feels like a whole new mountain to climb. How do the letters connect? Why do they change shape?
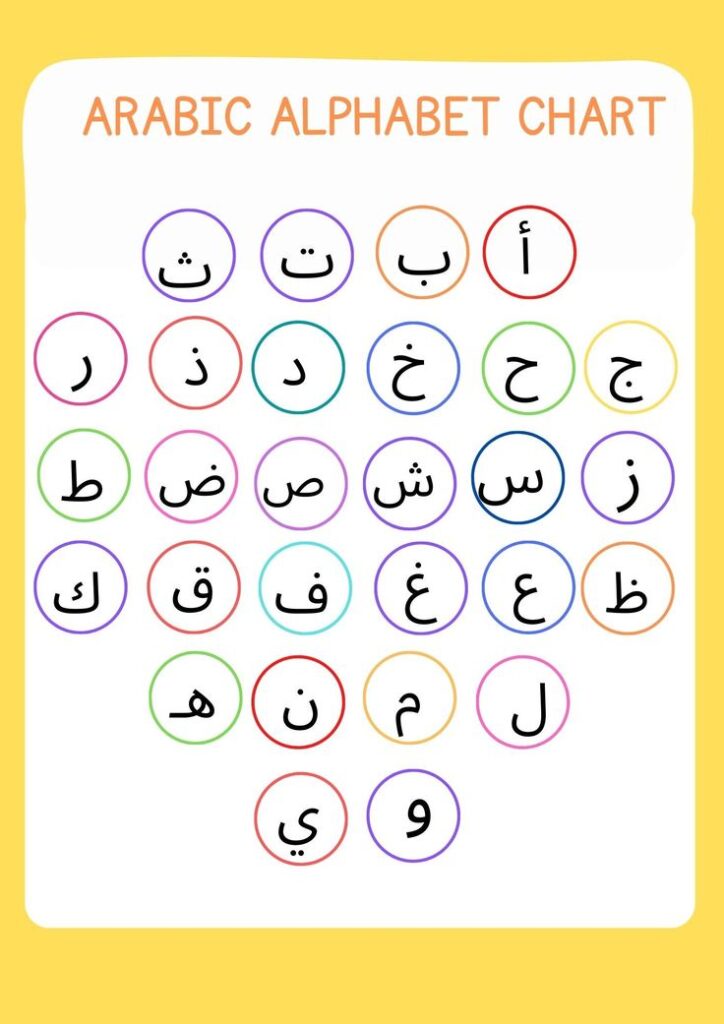
It’s a common frustration, but I’m here to tell you a secret: if you can write the 28 letters, you’re already 90% of the way there. The “art” of connecting them is just a small set of simple rules. This guide will give you those rules in 7 simple steps, making the process of learning how to write in Arabic much easier. This is the “Aha! Moment” that will unlock your ability to write with confidence.
Before we start, this guide assumes you know the alphabet. If not, our ultimate guide to the Arabic alphabet is the perfect place to begin.
Step 1: The “Right-to-Left” Golden Rule
The first and most important rule of how to write in Arabic is to always write from right to left. This might feel strange at first, but your brain will adapt quickly. Open a notebook and just practice drawing lines from right to left to get a feel for it.
Step 2: Understand the “Connector” vs. “Non-Connector” Letters
This is the most important concept. Think of the 28 letters as being in two families:
| Letter Family | Description | The Letters (6) |
|---|---|---|
| Non-Connectors | “Selfish” letters. They will connect to the letter before them, but NEVER to the letter after them. They break the word. | أ ، د ، ذ ، ر ، ز ، و |
| Connectors | “Friendly” letters. They connect to letters before and after them. (All other 22 letters) | (ب, ت, ث, ج, ح, خ, س, ش, ص, ض, ط, ظ, ع, غ, ف, ق, ك, ل, م, ن, ه, ي) |
Memorizing the 6 “non-connector” letters is the key to mastering how to write in Arabic.
Step 3: The 4 Letter Shapes (Initial, Medial, Final, Isolated)
Arabic letters are like social people—they change their “outfit” depending on their position in a word. But the good news is, there are only 4 positions, and the changes are minor and logical.
- Isolated: The letter’s full shape, as you learned it in the alphabet.
- Initial: The shape at the beginning of a word. (Usually loses its tail to connect to the next letter).
- Medial: The shape in the middle of a word. (Connects from both sides).
- Final: The shape at the end of a word. (Connects to the letter before it and then returns to its full, beautiful shape).
Step 4: Let’s Write a Word: “Kitab” (Book)
The word for book is كتاب. Let’s build it.
- First letter (ك): We use the initial shape of “Kaf”.
- Second letter (ت): It’s in the middle, so we use the medial shape of “Ta”.
- Third letter (ا): It’s a non-connector! We use its final shape. It connects to the “Ta” before it, but breaks the connection after.
- Fourth letter (ب): Because the “Alif” before it was a non-connector, the “Ba” must start fresh with its isolated (or final) shape.
You see? It’s a logical system. You now officially know the basics of how to write in Arabic!
Step 5: The “Ligature” – The Special Case of Lam-Alif (لا)
There is one special combination you must memorize: when the letter “Lam” (ل) is followed by “Alif” (أ), they merge into a unique, beautiful shape called a “Lam-Alif” ligature ( لا ). Think of it as a “power couple” that always appears together. For a deeper dive into Arabic calligraphy, the Encyclopædia Britannica has an excellent entry on the topic.
Step 6: Your “Writing Checklist” for Practice
- [ ] Write the 6 Non-Connectors: Write them 10 times each to burn them into your memory.
- [ ] Practice One Letter Family: Take a letter like “Ba” (ب ) and write it in its four shapes.
- [ ] Write 3-Letter “Connector” Words: Write simple words like “kataba” (كتب) where all letters connect.
- [ ] Write Words with Non-Connectors: Practice writing words like “dars” (درس) to see how the letters break apart.
- [ ] Copy a Full Sentence: Find a simple sentence online and try to copy it. Don’t worry about perfection!
This skill is the foundation for everything else. It’s even more fundamental than how to read Arabic with vowels, because writing forces you to understand the core structure of words.
Step 7: Common Mistakes to Avoid
Many beginners stumble on a few common issues. Being aware of them is half the battle in learning how to write in Arabic.
- Floating Above the Line: Arabic has a baseline, just like English. Pay attention to how letters like “Ra” (ر) or “Waw” (و) dip below the line.
- Incorrect Dot Placement: The dots for letters like “Ba” (ب), “Ta” (ت), and “Tha” (ث) are crucial. A misplaced dot changes the letter entirely. Be precise!
- Forgetting the Non-Connectors: The most common mistake is trying to connect a letter after one of the six non-connectors. Remember, they create a space.
Step 8: From Pen and Paper to Digital
Once you’re comfortable with handwriting, you can start typing. The great news is that you don’t need to worry about letter shapes when you type! The computer does all the work of connecting the letters for you. This is a great way to reinforce what you’ve learned about how to write in Arabic.
This guide has shown you the core principles of how to write in Arabic. It’s a journey from individual letters to flowing sentences that is shorter than you think. Now, all that’s left is a little practice. The key to mastering how to write in Arabic is consistent, mindful effort.
If you want to see this in action, with animated videos showing you exactly how to form and connect each letter, our free starter course is the perfect next step.
If you want to see this in action, with animated videos showing you exactly how to form and connect each letter, our free starter course is the perfect next step.
Start Writing Arabic Today – Get Your Free Starter Course!